Shark Sand Cups Recipe! Shark Week July 20 2025
This post may contain affiliate links. Please read our full disclosure policy.
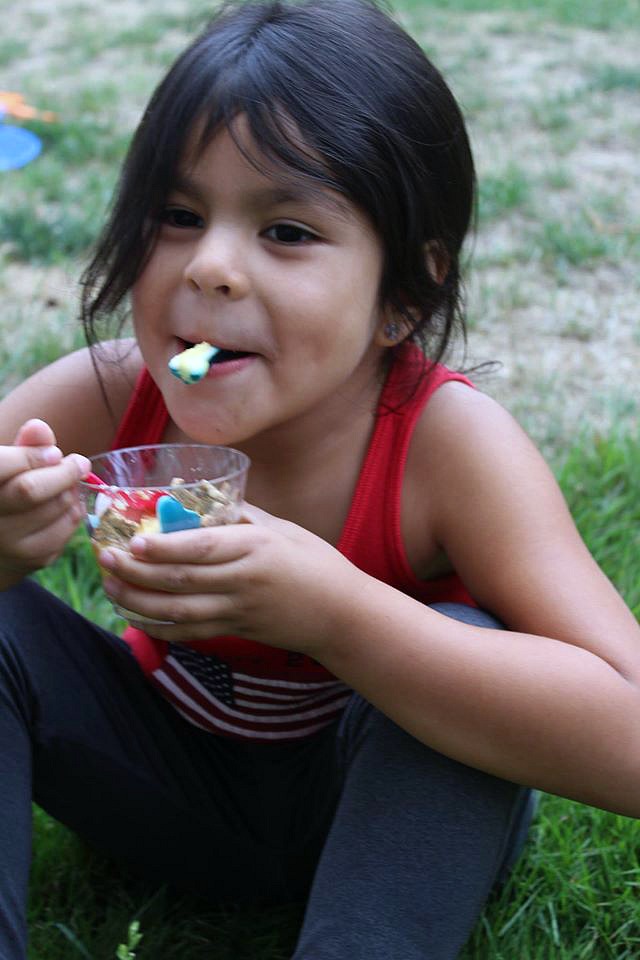
Shark sand cups are a huge favorite of my kids; we have been making them since Kylie was in preschool. Over the years, we have started to make them with different themes. This is a fun treat for kids of all ages.
This summer the girls have had a ton of fun in my kitchen making up new snacks to share with their friends! Now with it being summer, Michael decided that we need to do shark ones for Shark Week. Bella insisted on teddy bear crackers for her sand cups.
Sand Cups Ingredients:
Save this recipe!
Love this recipe and want it delivered right to your inbox within minutes? Just fill you email address in the form below and click save to get it plus more from CookEatGo!
How To Make Shark Sand Cups Directions:
In a separate bowl, make your pudding by following the direction on the package and set aside to allow it to set and firm up
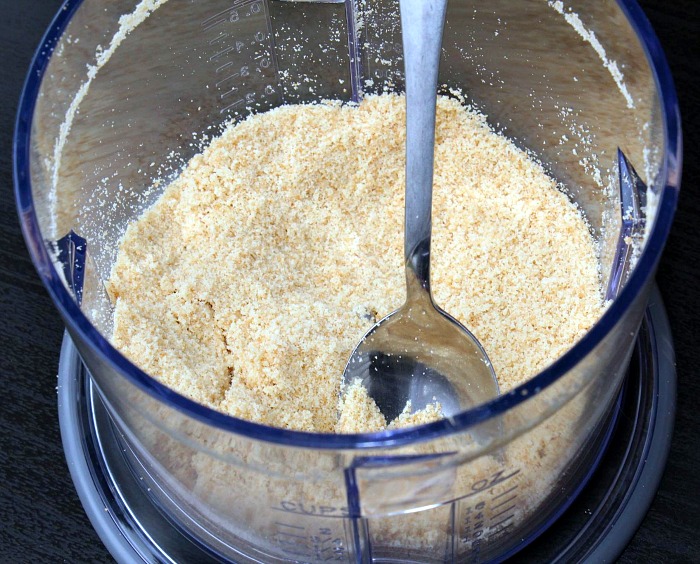
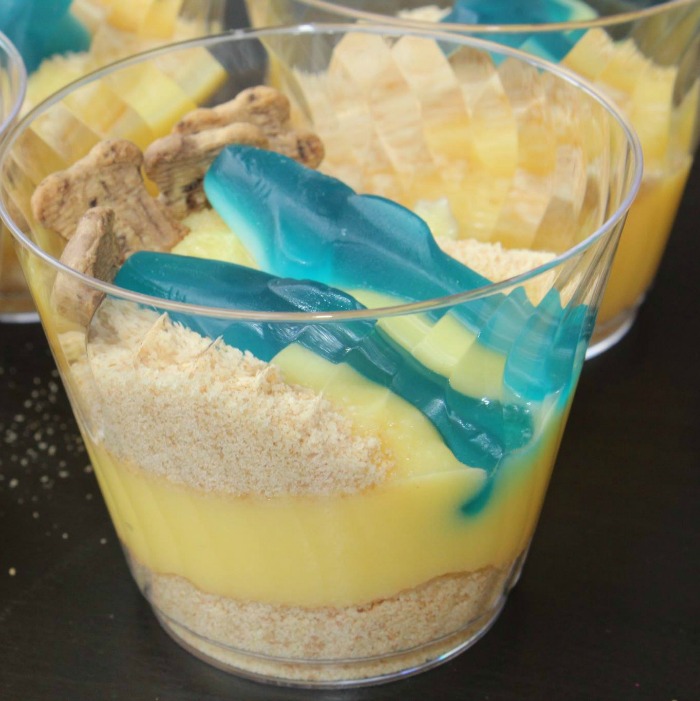
Using a food processor grind up your vanilla wafers to create the sand for the bottom of the cup. I personally love my Ninja for smaller jobs like this.
After your pudding has set and thickened, mix in the whipped topping.
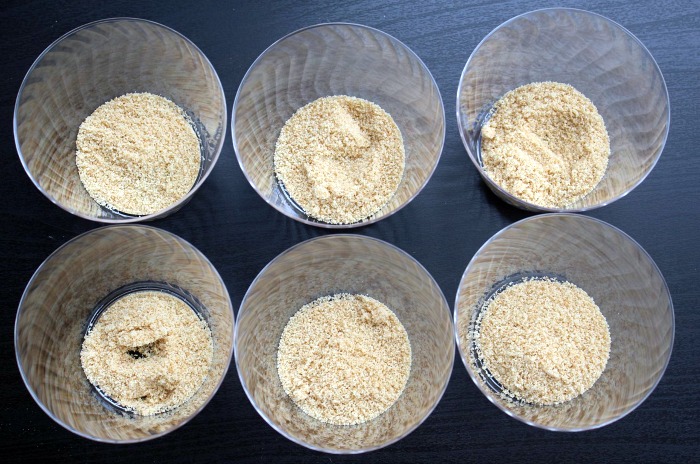
Fill the bottom of your cups or bowls with the ground vanilla wafers.
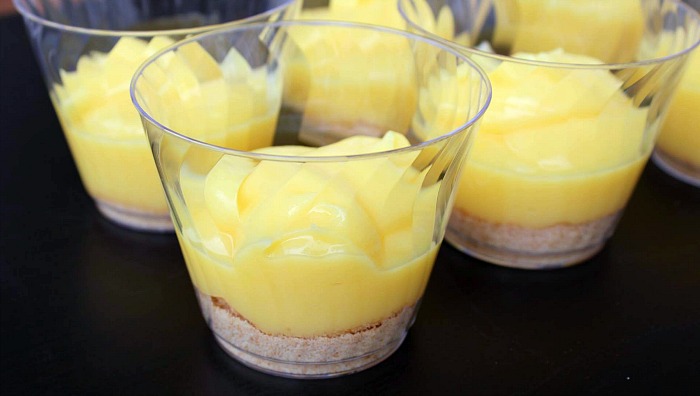
Scoop in the pudding and whipped topping mixture.
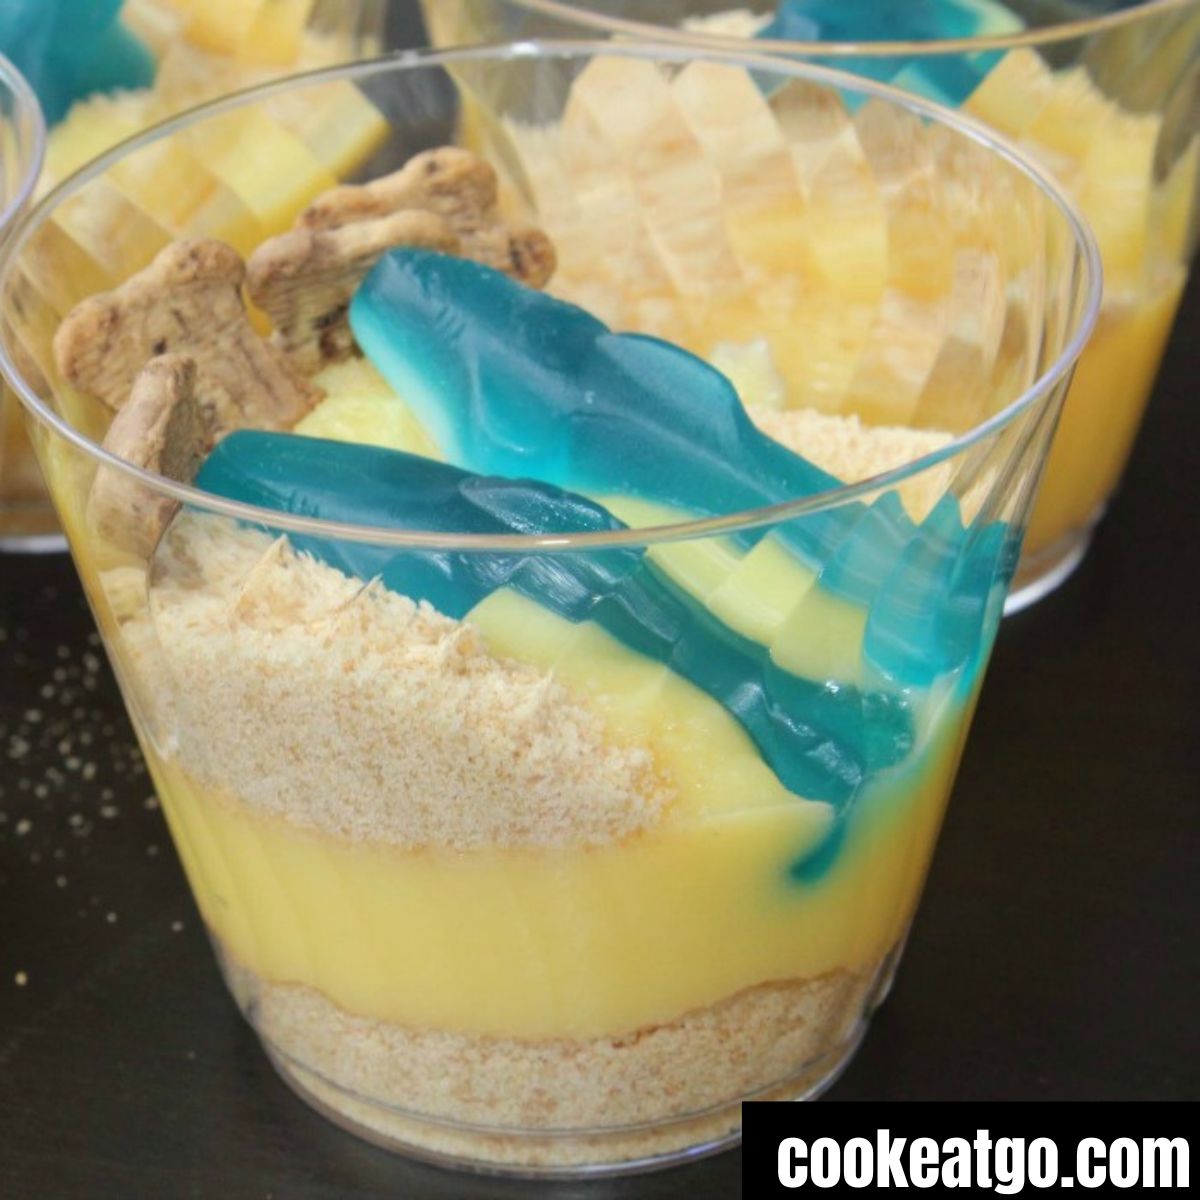
Top with your choice gummy and sprinkle over the remaining vanilla wafers to give it a sand effect.
You can also decorate the cups or bowls with stickers as well to match a theme for a party or snack meal as well.
Yes, we ended up with a couple of cups with sharks eating the teddy bears!! What is your favorite snack to whip up with the kids??
Shark Week Desserts:
Shark Week Activities To Do:
Dessert Recipes to Check Out
- Easy Dessert Recipes
- 2 Ingredient Desserts
- Cake Mix Cookies
- Peanut Butter Desserts
- Delicious Bark Recipes
- Ice Cream Floats
- Potluck Desserts
- Angel Food Cake Mix Recipes
- Triple Chocolate Bundt Cake

Shark Sand Cups!
Save this Recipe!
Love this recipe and want it and more in your inbox? Just add your email below and click save to get it delivered right to you along with other updates!
Equipment
Ingredients
- 5.1 Ounce Instant Vanilla pudding
- 11 Ounce Vanilla Wafers
- 10 Ounce Whipped Topping
- 3 Cups Milk
- Shark Gummies
Instructions
- In a separate bowl make your pudding by following the direction on the package and set aside to allow to set and firm up
- Using a food processor ground up your vanilla wafers to create the sand for the bottom of the cup
- After your pudding has set and thickened mix in the whipped topping
- Fill the bottom of your cups or bowls with the ground vanilla wafers
- Scoop in the pudding and whipped topping mixture
- Top with gummy of your choice and also sprinkle over the remaining vanilla wafers to give it a sand effect
- You can also decorate the cups or bowls with stickers as well to match a theme for a party or snack meal as well.


Hahahaha! Very cute indeed. Mimi xxx
This looks like so much fun! I love how the ground up wafers look like sand. Great job. Thanks for sharing!
They look delicious
These are so stinkin’ cute. And absolutely perfect for shark week!
A definite treat to serve for a boy’s birthday with a shark theme!
These are too cute, Jenny! Thanks for sharing =)
Blessings,
Edye
Super cute. I’m planning a beach party for my grandson. We’ll be making these!
Thanks for sharing!
These are too cute!
These are so cute! I can picture these as a perfect treat at a summer party!
Those are so cute! I love that you used a couple layers of ‘sand’, too.
How many little cups does it make?
Such a cute idea!